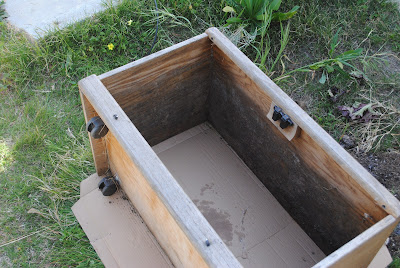
First, you have to get a container for the farm. You can do this in a big plastic tub, or anything else. I used this weird old wooden shelf that was in our back yard. Previously, it was full of dirt, so I dug it out.
Then, for no real reason, I put some cardboard on the bottom. I think it was because I was afraid the worms were going to try and escape.
Then, because I thought the cardboard would be harsh and scary for the worms, I put some dirt on top of that.
Apparently worms really like newspaper. I don't know why worms like newspaper. But I ran over to The Cooler to get a stack of old New York Times to accomodate them. We had recently taken out the recycling and didn't have any just lying around.
So then you have to to tear the paper in to strips. About one inch thick, but no one is measuring, so don't be exact about it. In the beginning, I tried cutting with scissors, but that was too hard and made my hand cramp, so I would definitely recommend tearing.
Wet those paper puppies down. They need to be damp, so the worms' little bodies don't dry up, but you don't want them to be too too wet, either. That could attract gross smells and maybe kill the worms. I don't know, but they're just not supposed to be super wet according to what I read. When putting them down, make sure they're fluffed up and not just a big mush of last friday's top news stories.
Concerned that the worms might get homesick for their previous lives, I put a little bit more dirt in. This is also supposed to be good because it puts a bit of grit in to the worm's system, makes them tough.
Once again, I added some more newspaper. In all, it took me about nine New York Times, so if you plan on doing this at home, start saving your papers more than a week in advance.
And now, I reveal to you; The Worms:
I spent about two hours digging these suckers up. I'm not a worm expert, nor do I pretend to be, but I think there are three different types of worms in the FEAST garden, at least that I saw. The first are red and when you pick them up they squirm like crazy. The second are really gross looking, like a yellow/green color and just curled up. And then the third are standard earthworms, some of which were incredibly massive. I heard the red ones are supposed to be the best at composting, but I also thought that it would be nice to have a diverse worm population, so I just threw the whole bunch in a wished them luck.
The worms need food, and the best way to do this is to add your food scraps. Be mindful, however, that worms really do not like onions, citrus, or anything else that is sting-y, since their whole bodies are very sensitive. Also, don't put meat in with the worms. Meat is universally agreed to be something you don't put in compost. As you can see in the picture, there are some carrot peelings, but later I threw in some gross blueberries after making a pie.
Next, you have to put a top on it, to keep the moisture in and the heat out. I just used some cardboard and rocks.
After this, you just leave your worms to stew, occasionally putting in more food and adding a little bit of water. Worms eat about half of their body weight in a day, and reproduce pretty quickly, doubling their population in a month, so as time goes on, make sure you keep adding food. I don't know what to do with the worms once they're ready to be farmed, or how to gather their waste, but when I get to that point, I'll let you know what goes down.
Hopefully you are now prepared to make a worm farm of your own. If not, just use google. There are plenty of sites with advice much more expertise than my own.


No comments:
Post a Comment